This post is the first in a series of oil painting project tutorials derived from coursework completed at Academie Noord in Brasschaat, Belgium. Projects were designed by Schilderkunst teacher Marilou van Lierop. The sample artwork is my own.
Some art projects are designed to prove a point. This one most certainly qualifies. My painting instructor, Marilou van Lierop, asked us students to find online images of ugly porcelain figures. She advised us to keep things simple, and to look for images with a visible cast shadow. She also said not to focus too much on the aesthetics of the image. A beautiful painting, she noted, is often created from a less-than-beautiful subject. The delicate, reflective, and glossy surface of porcelain especially renders itself nicely to oil painting.
Naturally, I forgot my image. So I, along with a good number of other students, was assigned one.

Marilou handed me a print-out of this elegant madame with sailor tattoos by artist Jessica Harrison. I don’t consider it ugly, and there was no cast shadow to paint wet-on-wet, but beggars can’t be choosers, now can they?
Interested in painting along? Join me by following the step-by-step instructions below.
Project: Oil Painting of a Porcelain Figure
Skills Exercised: Imprimatura, Wipeout Method of Underpainting, Painting Wet on Wet, Painting in Value Gradations, Glazing, Scumbling
Materials: Water-Mixable Oil Paints, Water, Water Mixable Linseed Oil, Paint Brushes, Canvas/Canvas Paper/primed wood panel
The Palette
In this class, we use water mixable oil paints and mediums. Not only are they better for the environment (water is used as a solvent), they’re also much better for our health in a crowded classroom (less toxic fumes).
My painter’s box includes the following Winsor & Newton Water Mixable Oil Colours, as suggested by my painting teacher. Other brands may work just as well, but I haven’t tried them myself. All additional colors are either mixed on the palette or created through glazing onto the painting.
- Yellow Ochre
- Cadmium Yellow Pale Hue
- Burnt Umber
- Burnt Sienna
- Permanent Alizarin Crimson
- Cadmium Red Hue
- Cerulean Blue
- French Ultramarine
- Viridian
- Titanium White
I also use a bottle of Winsor & Newton Artisan Water Mixable Linseed Oil
Part One: Imprimatura and Drawing
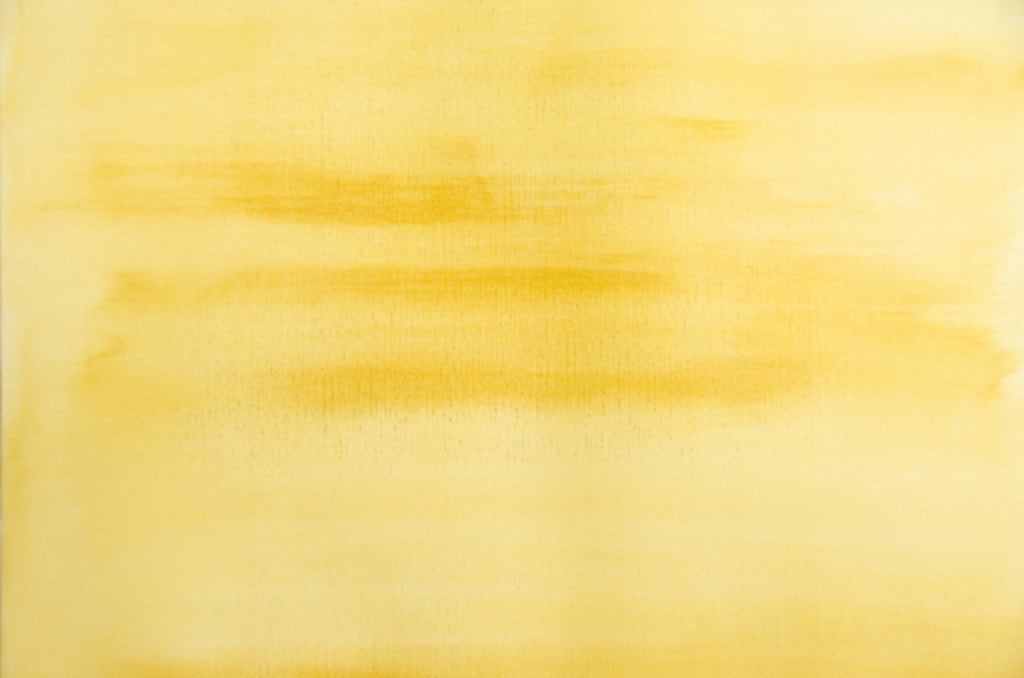
We begin by spreading a thinned yellow ochre wash over the entire painting surface. This is known as imprimatura. It helps to break up the white of the canvas, to establish a mid-tone ground, and to help mitigate the yellowing that occurs during the aging of an oil painting. Since in this class, we use water mixable oil paints, we thin the paint by mixing it with water. If you’re using normal oil paints, you would thin with turpentine or odorless mineral spirits.
For more information and guidelines about imprimatura, click here.

Next, we print a black and white version of our photograph, and use a pencil to divide the values into three sections: darks, midtones, and lights. You’re not looking for the darkest darks and highlights, but rather broader areas of dark, midtone, and light. In my photo, I outlined the darks with blue marker and the lights with black charcoal. This is an exercise for beginners to assist in learning to identify value ranges. As you gain more experience, you’ll be able to do it intuitively.

We then return to our canvas, armed with a charcoal pencil. Lightly block in your subject, beginning with broader shapes, then progressing on to the finer details. Mistakes can be erased using a dry rag.
Once you’re comfortable with your drawing, leave the painting to dry overnight.
Part Two: Wipeout Underpainting
Now you’re ready to create a 3-tone wipeout underpainting, using your black and white printout (or intuition if you’re more advanced) as a guide.
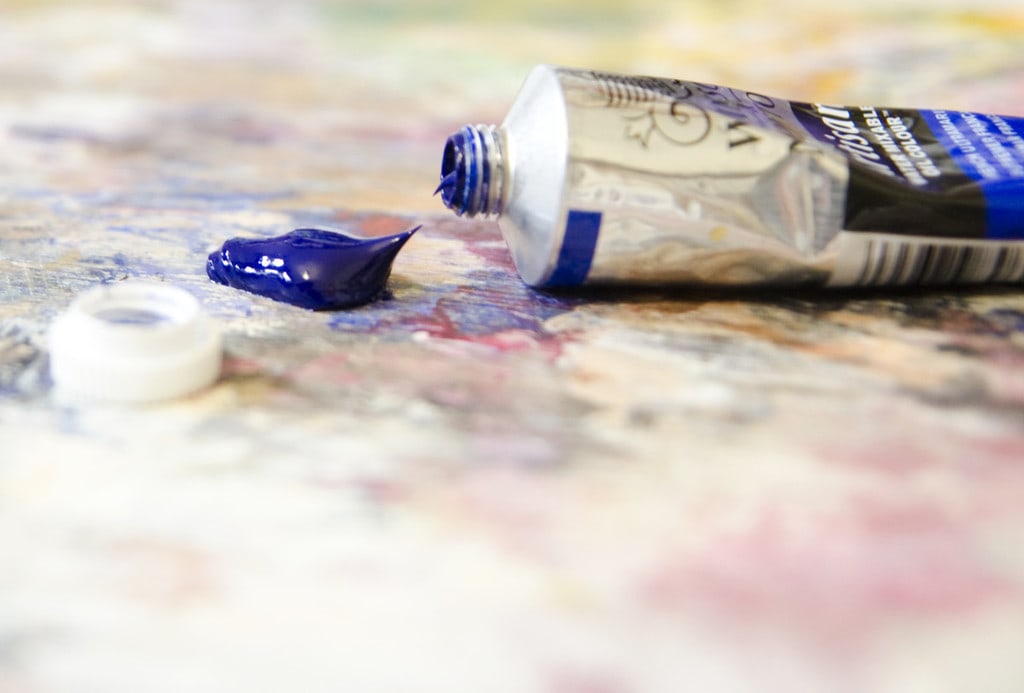
Begin by squeezing some ultramarine blue oil paint onto your palette

and thinning it with just a few drops of water. Again, in this class, we use water mixable oil paints, and we thin the paint by mixing it with water. If you’re using traditional oil paints, you would thin with turpentine or odorless mineral spirits.
Lightly paint in the dark areas that you’ve defined in your drawing. Load only a small amount of paint on your brush, and wait until there’s none left before reloading. You want to keep this layer as thin as possible. Remember to paint in the dark areas of the background as well as in the figure.
Next, use a clean rag dipped in water (if you’re using water mixable paints) or turpentine/odorless mineral spirits (if you’re using traditional oil paints) to wipe out the areas you’ve identified as lights in your drawing. Remember to wipe out the light areas of your background as well as in the figure.
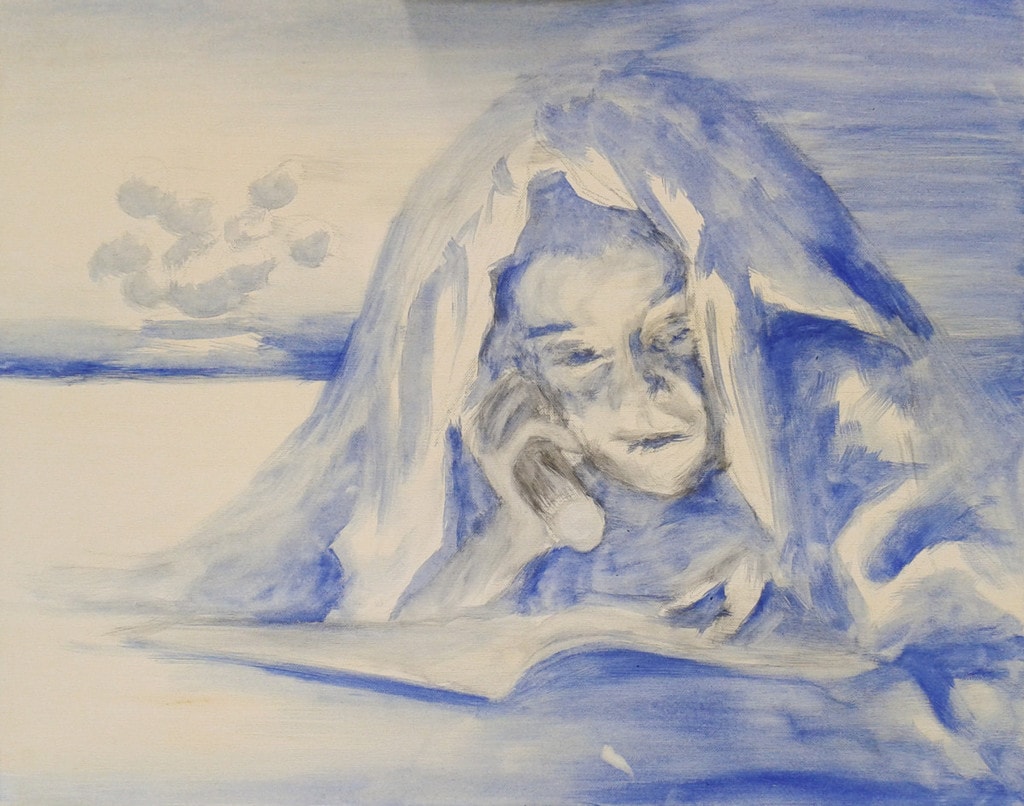
I didn’t capture my painting at this stage, but here’s a good example from another project.
Since you’ve used the midtone yellow ochre as a base layer, you now have an underpainting with the three major tonal areas defined. It may not be too pretty, but this is actually an excellent starting point that will guide you through the rest of the painting process. Give yourself and your painting a rest, and allow it to dry overnight.
Part Three: the Overpainting
This is where the real magic happens. You’re now going to begin painting your figure in values of real local color.

We start with the background. As mine was a solid color, I mixed only that one color on the palette. I only needed a tiny dab of French Ultramarine to tint a blob of Titanium White to the right light blue color. The blue paint that you see to the left in the photo remained unused.

Thin the mixture by mixing just a few drops of Linseed Oil directly into the paint. Again, if you’re using traditional oil paints, you would thin with traditional Linseed Oil.

Load a stiff bristle brush from the hardware store by dipping only the very tip in the edge of your paint, and then pulling away. You only want a tiny amount of paint on the brush.
Spread the background color over the background area as thinly as possible. You can paint in every direction for fuller coverage, and then brush over the entire background in one direction to make things look smoother… or if you prefer a rougher look, just leave it wild.

Now mix strings of the necessary colors on your palette. You’re looking for local colors at this stage, e.g. the skin is peach, the lips are red, the dress is white. Don’t think about the finer details, e.g. the pinkish tint of the cheeks, the blue in the shadows.
My entire subject was painted using only three colors, namely Burnt Sienna, Permanent Alzarin Crimson, and French Ultramarine. I mixed 9 values of Burnt Sienna, mixing with Titanium White to lighten, as I was sure that I wouldn’t need any darker values. I mixed three values of Permanent Alzarin Crimson (for the lips), using Titanium White to lighten. If you need a guide for mixing your values, you can print out or purchase values strings to compare alongside your paint. You can find a great online resource for color and value at Brandi Hussey’s Blog, or buy an artist's color wheel at an art store such as Blick Art Materials.
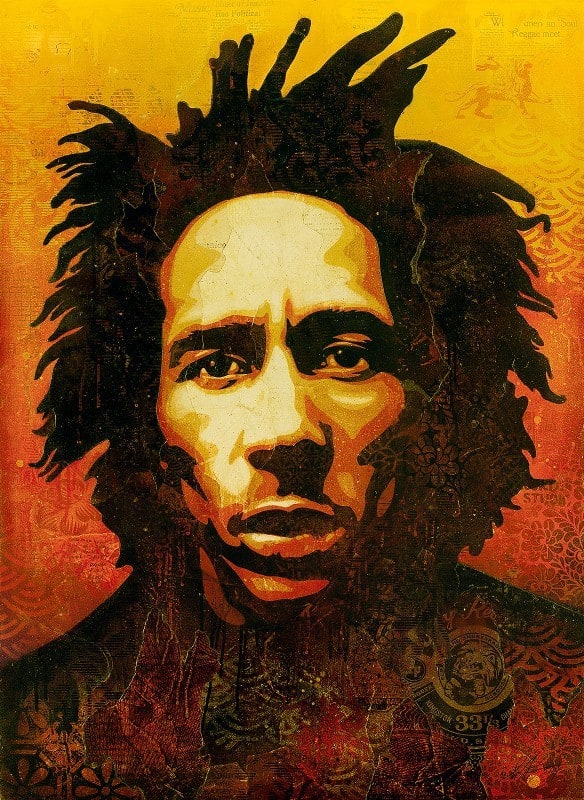
With your colors prepared, you’re ready to paint your porcelain figure wet on wet. The initial goal is to paint areas of each value, without blending them. The above image of Bob Marley by Shepard Fairey gives a very clear example.
Start by thinly painting in your darkest darks. You might want to thin your colors with a few drops of Winsor & Newton Artisan Water Mixable Oil Painting Mediums or Winsor & Newton Refined Linseed Oil, and paint thinly with a stiff bristle brush (a hog bristle filbert works well). You don’t want to see any brushstrokes at this stage, and you do want some of the underpainting to show through. When you’re finished laying in the darks, move on to the next value, but keep each value separate from the one before. Slowly work through your value string until you get to the lights, but don’t paint in the highlights.
Go back and gently blend the borders of your adjoining values with a soft sable brush. Work from light to dark, and remember to blend between your figure and the background. Don’t leave any sharp edges. This will make your painting more subtle and less posterized. It will also allow you to continue to build onto your painting seamlessly and more convincing when you add more paint in the next step.
Repeat this process for each area of local color: the eyes, the lips, the dress, etc. As the last step of this tonal painting, you can add in the blacks. In this figure, black is only found in the eyelashes and pupils.
 Finally, you can add in some highlights. They should be painted quickly, and thickly (not blobs, but thick enough to be opaque), for maximum effect.
You’ve made some excellent progress. It’s time to take another break, and let your painting dry completely. You can keep your value strings in blobs. A film will form over the top, but this can be peeled away to use the paint again in the next stage.
Part Four: Refining the Overpainting
In the previous stage, our painting was painted quickly and roughly. Now it’s time to add some of the finer details, and strengthen the shadows and highlights.
Go back and revisit every area of your painting, refining shapes and creating edges where they exist. Apply another layer of transparent paint to the deepest shadows the create an illusion of more depth. Keep the paint thin, but you won’t need to use much if any painting medium at this point.
 Let your painting dry for about a week. It may take more or less time depending on the colors used and the thickness of your layer. You’ll want to be able to paint onto the surface with a stiff hair brush without wiping away any of the paint before proceeding.
Part Five: Glazing
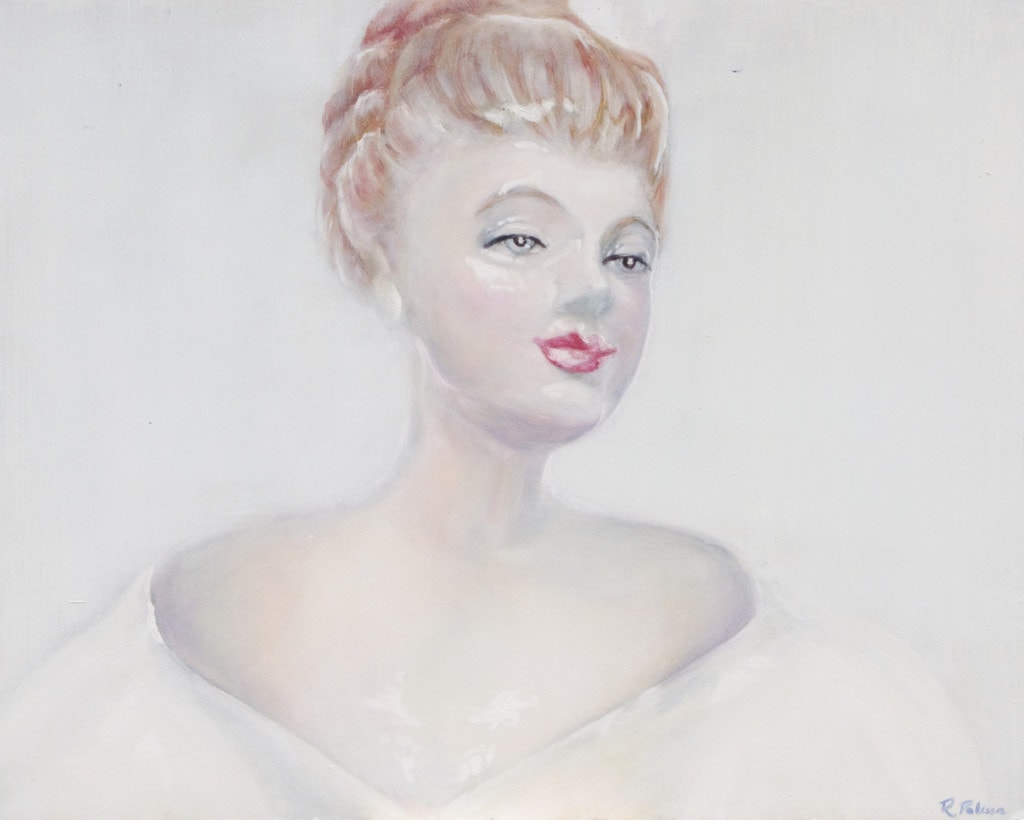
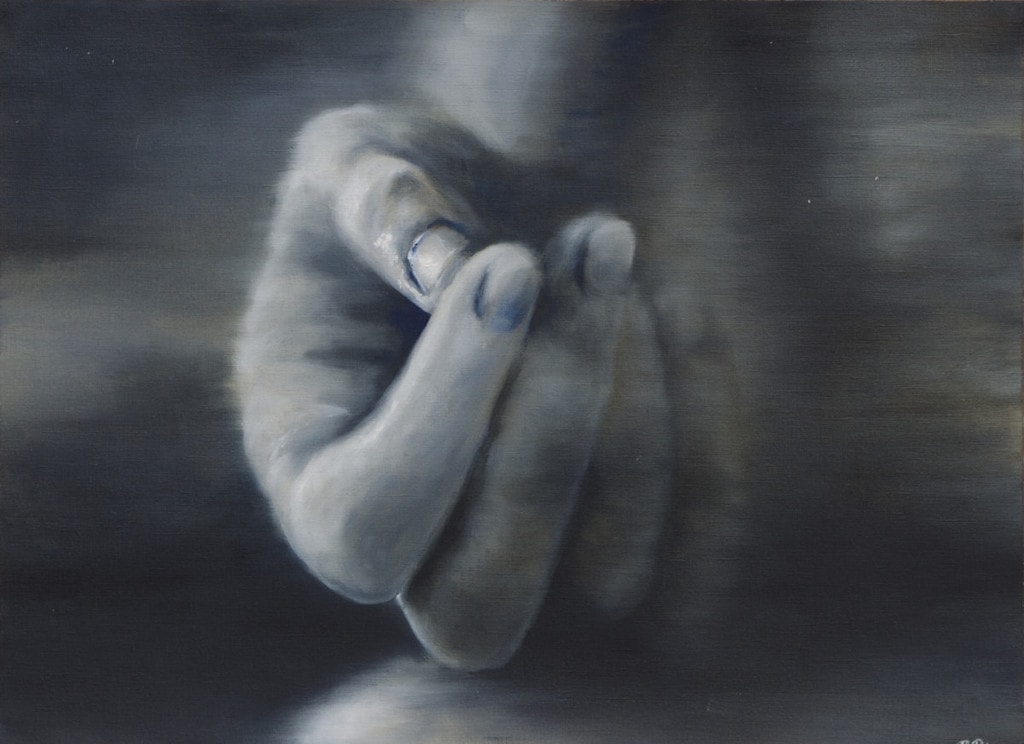
Glazing is the process of adding thin transparent layers of pure color to the surface of an oil painting. Although it is optional for this project, it can add some subtle details and added depth to the work. For my figure, I wanted to add pink to the cheeks and under the chin. Depending on your subject, you might want to add other colors.

Porcelain Figure Study, Detail. You can see the glazing with Permanent Alizarin Crimson in the cheeks and chin.
The process may seem intimidating at first, but it is actually quite simple. You choose a pure color, in my case, I used Permanent Alizarin Crimson, and squeeze in onto the palette. Then, mix in a few drops of Linseed Oil with a palette knife. With a stiff bristle brush, a rag, or even your fingers, very thinly work the color into your painting.
Do only one color for each layer of glazing, and let it dry completely before adding another.
Part Six: Scumbling
Scumbling is the process of adding a transparent layer of white to the surface of an oil painting. It is especially effective in depicting an overcast sky, a person with fair skin, or in our case, a porcelain figure.

The process is the same as for glazing. Add your white paint to the palette, and mix in a few drops of linseed or poppy oil with a palette knife. With a stiff bristle brush, a rag, or even your fingers, very thinly work the white into your painting.
…and here is my finished painting. If you’ve painted along, I’d love to see yours. Please share a photo or link to your artwork in the comments.


2 thoughts on “Porcelain Figure Oil Painting Tutorial”