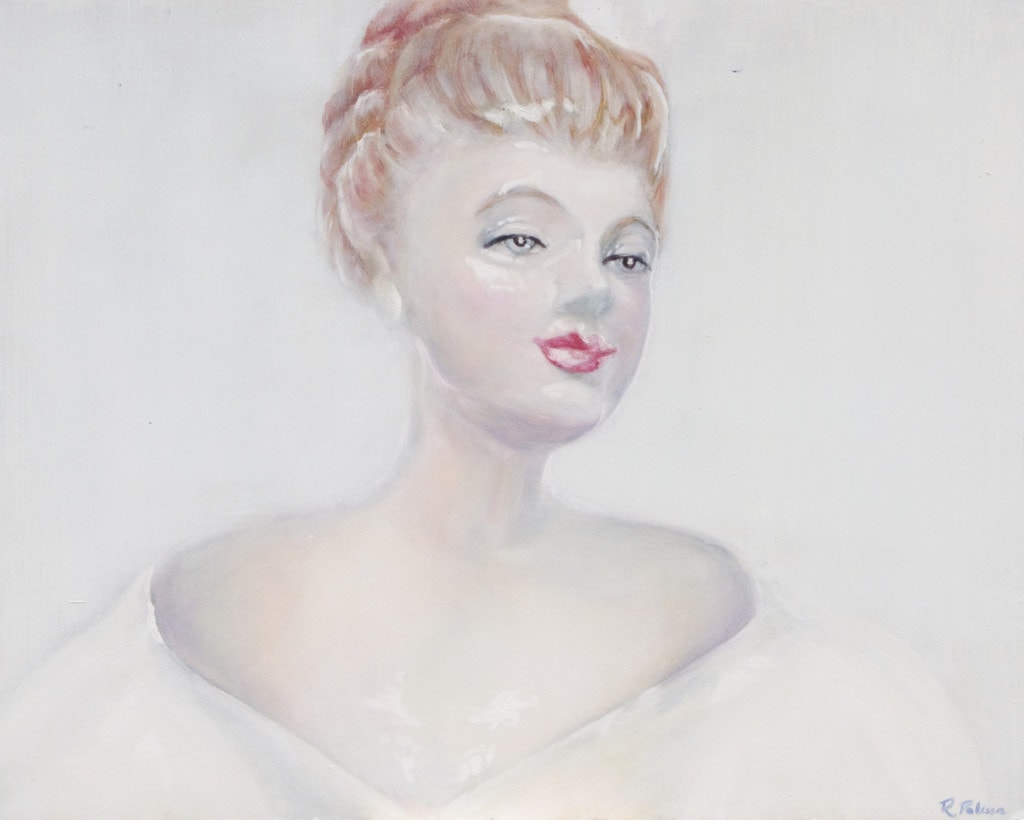
When working with oil paint, a solid underpainting sets the stage for success. The wipe-out or bistre method of underpainting is one of the easiest ways to get it right, even if you’ve never touched a paintbrush. I use it often when teaching beginners, and love starting a painting this way in my own practice. It’s tactile and you dive right into your art. It forces you to keep things general. It creates soft forms and edges, which allow you to make easy corrections later in your process. In short, the wipe-out method is straightforward and simple, and the results: almost always beautiful.
The Wipe-Out Underpainting in Art History
The wipe-out method of underpainting dates back to the 1100s. Traditionally speaking, it falls under the category of brunaille (brown) underpainting.
Brunaille has its roots in 12th century stained glass made for Cistercian monasteries, which prohibited the use of colored art in 1134. However, it was only in the early 17th century that the French term “brunaille” was coined to describe pictures painted in shades of brown.
-From Wikipedia, the free encyclopedia
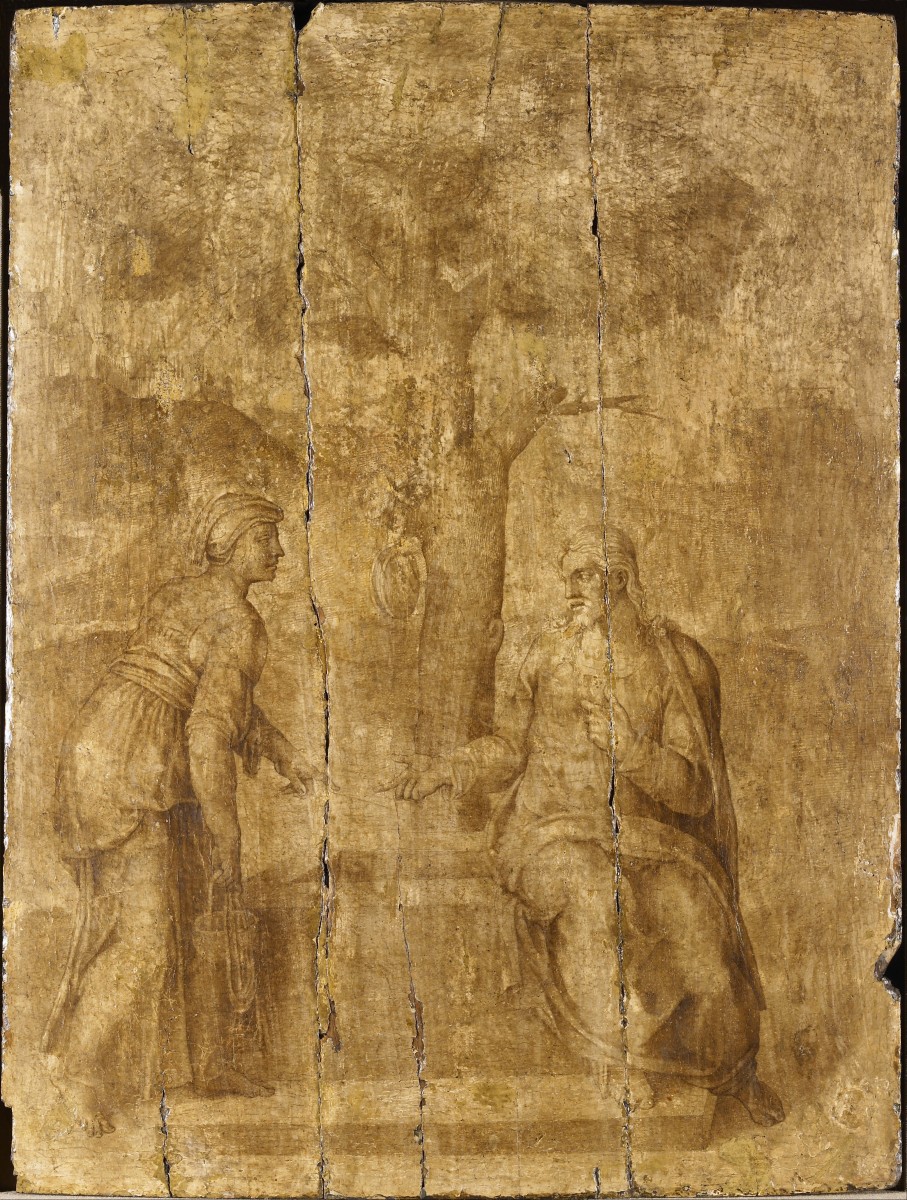
The wipe-out method is also known as the bistre method, referring to a brown pigment made from the soot of burned beechwood. Bistre was very popular for ink drawings during the Renaissance (see the drawing by Michelangelo, above.) However, being an unstable color, it is no longer used in oil painting. Nowadays, we opt for a permanent dark brown such as raw umber.
How to Create Your Own Wipe-Out Underpainting
In this tutorial, you’ll learn the classical process to create a wipe-out underpainting. This layer provides a generalized map of light, mid-tone, and shadow that will guide you through the rest of your painting. As the name implies, the method is subtractive: we literally wipe away paint to reveal the final image.
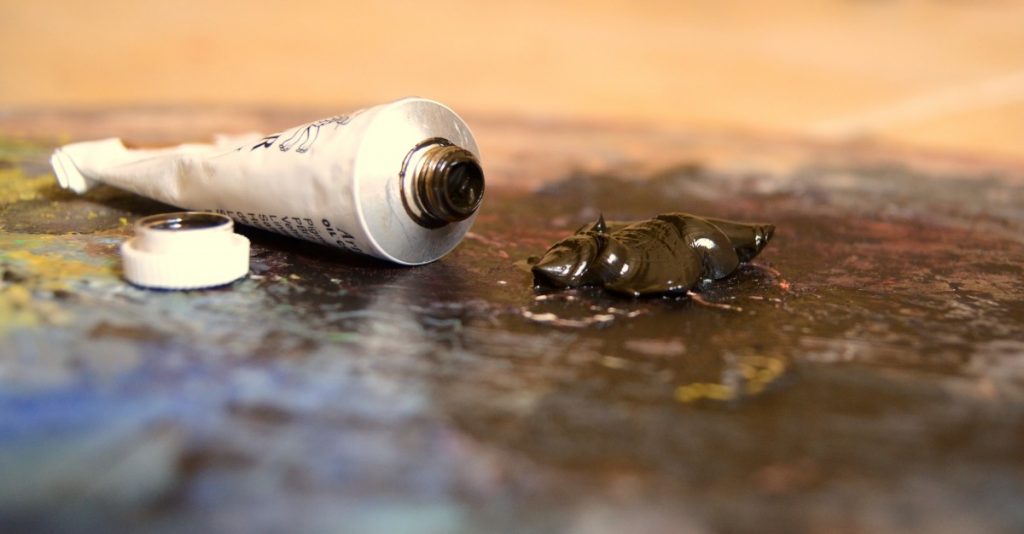
Raw Umber Oil Paint is the traditional color choice for a wipe-out underpainting, and it sets the tone for a wonderfully warm artwork. However, you may choose any color you like — just keep in mind that “lean” or low-oil-content colors are preferred. Some old masters used gray (grisaille), green (verdaccio), or venetian red. Each option will affect your workflow and results. The best way to learn and develop your own process is to try them all!
Materials:
- Raw Umber Oil Paint (or another color of your choosing)
- Odorless Mineral Spirits
- India Ink or Waterproof Marker
- Wide Hog Hair Paint Brush
- Palette Knife
- Painter’s Palette
- Painter’s Rag (the best are repurposed old bed sheets, torn into squares)
- Vinyl or Rubber Gloves
- Canvas, Canvas Board, Primed Wood Panel, or Canvas Paper
Process:
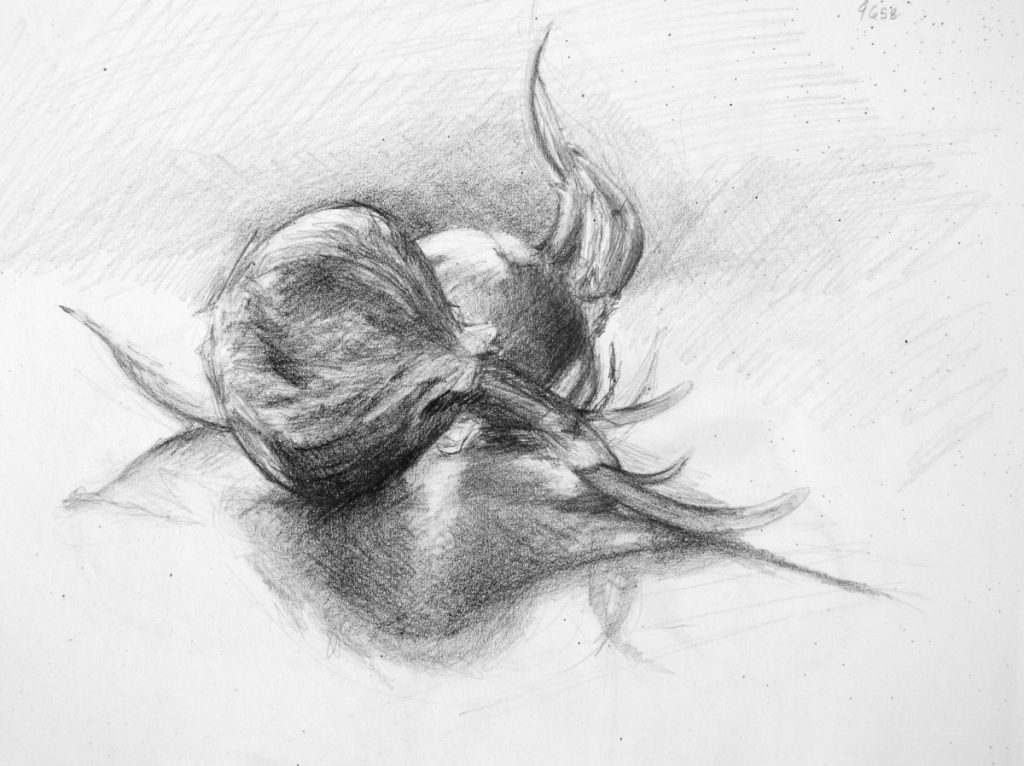
1. Create a drawing to identify the areas of light, midtone, and shadow in your subject.
2. Transfer the drawing to your paint surface.
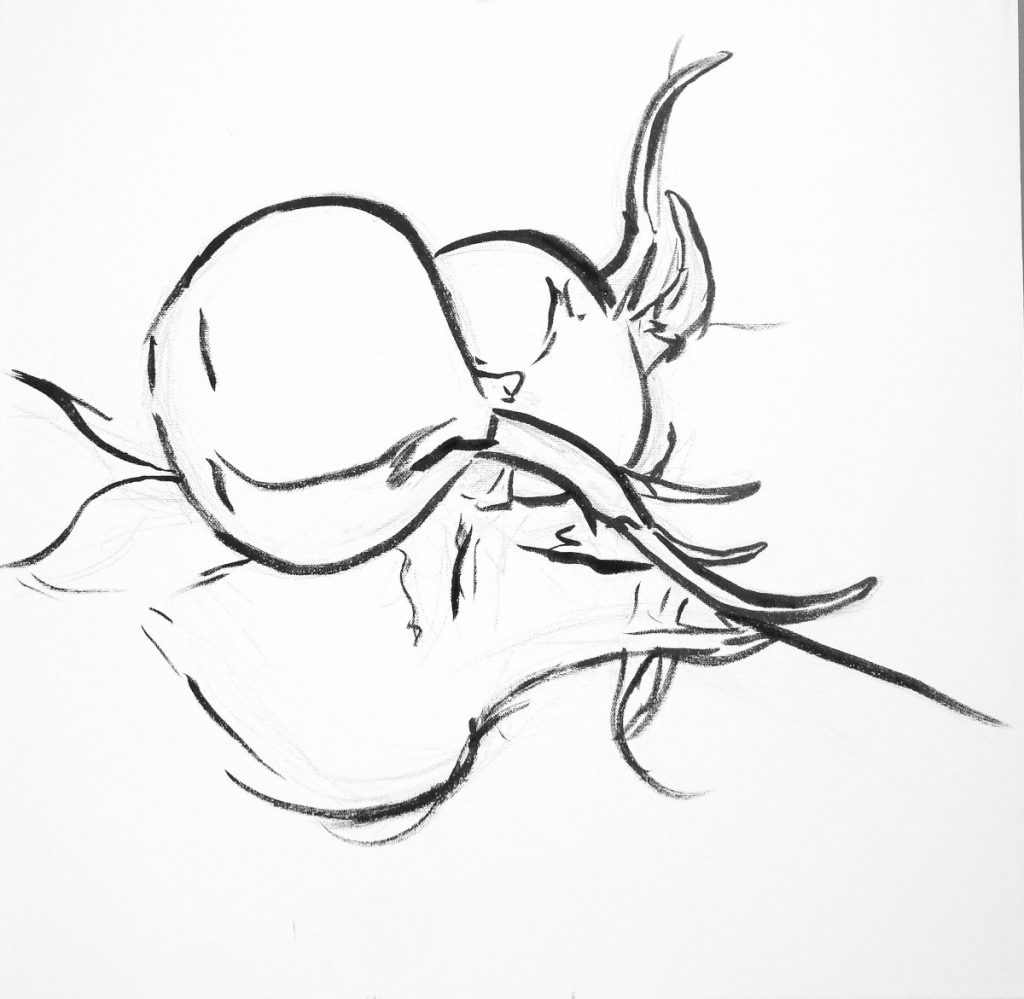
3. Strengthen the outlines with either india ink or a waterproof marker. India ink will need to dry overnight. Marker will dry within minutes.
4. Set up your work area. Keep in mind that this will be messy and some paint may drip or splatter. Cover your surfaces and stay clear of finished artworks.
5. Squeeze enough raw umber oil paint onto your palette to cover your entire painting surface.

6. Using your palette knife, add a few drops of OMS (Odorless Mineral Spirits) to the paint.
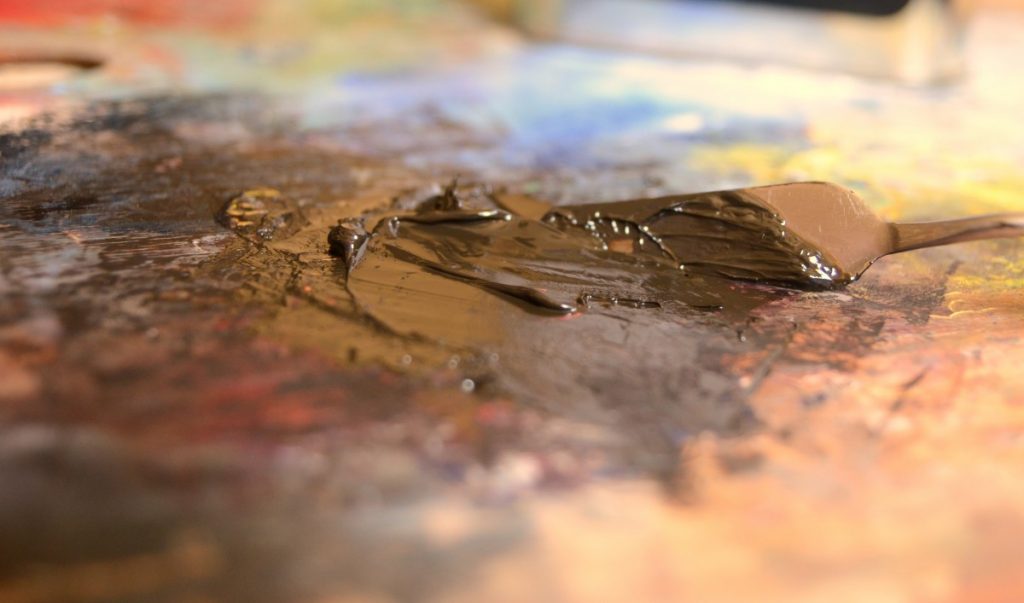
7. Mix well. The resulting mix should be soft, like pudding, but not watery. If you need a little more OMS, add a few drops at a time until you reach the desired consistency.
8. Dip your paint brush in pure OMS, and then dry it with a rag. You want it to be slightly damp.


9. Load the tip of your brush with paint, and brush over the entire paint surface (of your canvas, panel, … whatever you’ve chosen to paint on). Paint as thinly as possible, and spread the paint as far as it will go before reloading the brush. You want it to be smooth, with no brush strokes showing.
10. Put on your gloves. Things are about to get messy!
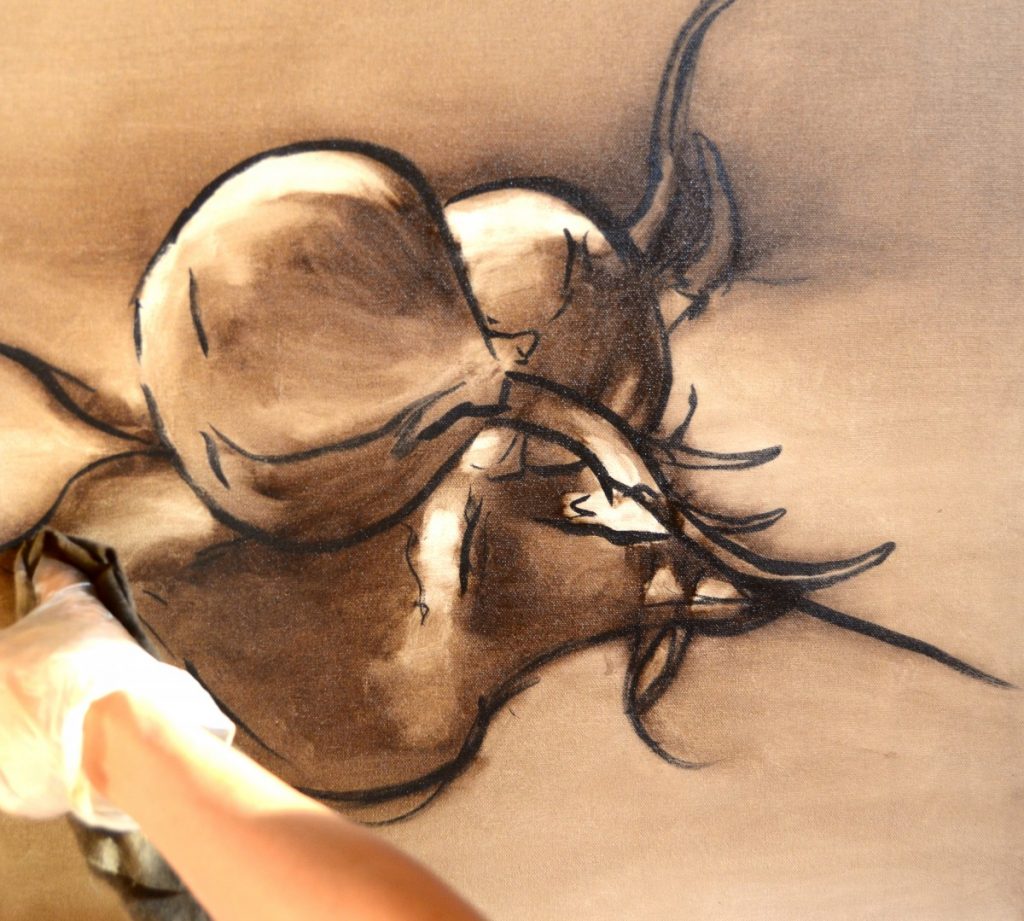
11. Using your rag, wipe away the areas of light and mid-tone. Don’t touch the areas of shadow. They will be defined by the raw umber you’ve already brushed on.
12. To strengthen the lights, dip the rag into OMS and then wipe them out. You’ll probably need to do a second wipe with a dry part of the rag to get off all the paint and blend together the lights and mid-tones.

13. When you’re finished, you may find that you accidentally wiped off some paint in the shadow areas. It’s ok to go back and add them in – thinly! – with a paintbrush.
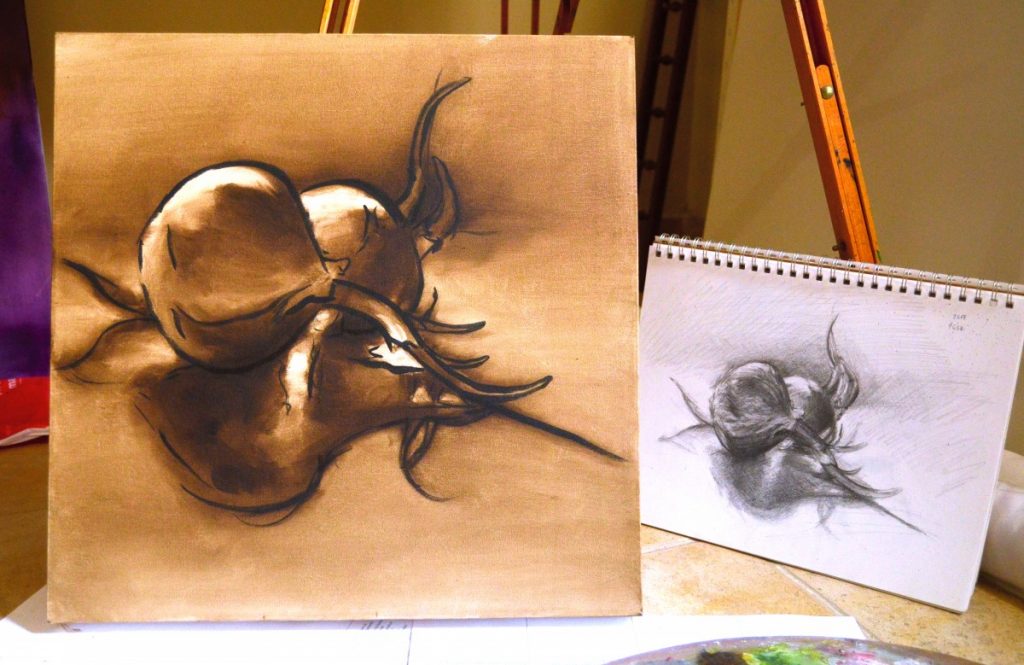
That’s it! Notice how the underpainting above is soft and general with no fine details. That’s exactly what you want at this stage. Give yourself a pat on the back and let your painting dry overnight. It should be ready for the next layer in a day or two.
The sample image formed the base layer for “Onions in Red”. Click here to view the finished painting.